Showing posts with label ohio flint. Show all posts
Showing posts with label ohio flint. Show all posts
Saturday, December 29, 2012
Ohio Flint Sterling Silver Ring
Tuesday, November 8, 2011
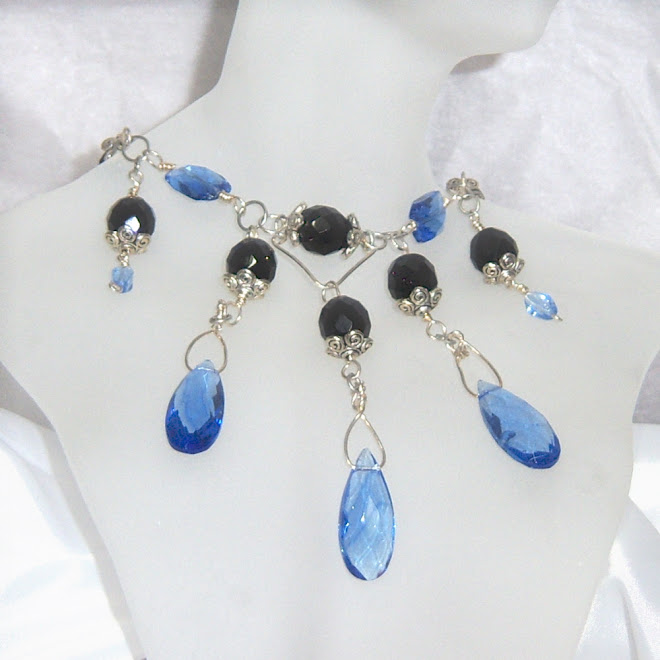
New Pendants Listed
Today is voting day in my area, I went and voted before I headed in to work toda y. This is my daughters first year to be able to vote and she was so excited. We sat down yesterday and went over all the issues on our particular ballot. I am so glad that she realizes that her vote DOES matter!
W hat does this have to do with pendants? Absolutely nothing lol. I listed four different kinds of pendants in the past couple of weeks, some lampwork pendants, a fused glass pendant,an Ohio Flint pendant, (which would make a perfect man's gift for Christmas by the way), and a couple of pretty pink quartz pendants. I will do a post on Ohio
  Flint here very soon, its only found in one part of the world and one area of Ohio.
Here's some pictures of some of the most recent pendants listings. If you see one you like, you can go take my poll on facebook and get 25% off of one too!
y. This is my daughters first year to be able to vote and she was so excited. We sat down yesterday and went over all the issues on our particular ballot. I am so glad that she realizes that her vote DOES matter!W
hat does this have to do with pendants? Absolutely nothing lol. I listed four different kinds of pendants in the past couple of weeks, some lampwork pendants, a fused glass pendant,an Ohio Flint pendant, (which would make a perfect man's gift for Christmas by the way), and a couple of pretty pink quartz pendants. I will do a post on Ohio Flint here very soon, its only found in one part of the world and one area of Ohio.Here's some pictures of
some of the most recent pendants listings. If you see one you like, you can go take my poll on facebook and get 25% off of one too!
Thursday, July 16, 2009
SilverRiverRocks Is Here!
 I have started a basic members shop on Artfire for destash. This will be mostly cabochons that I have cut myself and possibly some fused glass cabs also that I have made and possibly some destash beads. But its really hard for me to g
 ive any up lol! I have enough cabs to make something every day for at least two years but I JUST CAN"T STOP MAKING THEM lol! Its so relaxing and they are all so pretty lol! Anyway if things go well I will upgrade this shop to verified soon and start listing more than twelve at a time. I have some beautiful Ohio flint, which is found only in Ohio and is relatively rare. One of my favorite stones and I go and
  dig it up, slab and finish it myself so you will be purchasing true hand made by me cabochons. Come check it out!
SilverRiverRocks.Artfire.com
Friday, April 17, 2009
Why I Like to Play With Fire
Actually there are a lot of reasons why I like to play with fire. I have always had a fascination with flames (fe el free to insert pyro here lol), I was the kid who was always adding more sticks to the fire, can I help you light it Daddy, etc.! The play of colors in the fire pit, the way the flames dance and change color are fascinating to me to this day. And I still am the person who tends the fire when we gather around the fire pit in the summer. It also brings people together, we all gather round the fire, watch the flames and socialize, grateful for the warmth as the sun starts to go down.
el free to insert pyro here lol), I was the kid who was always adding more sticks to the fire, can I help you light it Daddy, etc.! The play of colors in the fire pit, the way the flames dance and change color are fascinating to me to this day. And I still am the person who tends the fire when we gather around the fire pit in the summer. It also brings people together, we all gather round the fire, watch the flames and socialize, grateful for the warmth as the sun starts to go down.You can imagine my excitement when I found out about metal work! Wow I can play with fire inside the house (mind you, my husband made it abundantly clear that this was going to take place downstairs with the appropriate safety measured etc. and NOT by the living room curtains!) and I can actually use it to MAKE something beautiful and wearable (instead of a small pile of ashes at the end of a night around the fire pit).
Once I started learning (and you REALLY don't want to know how many pieces  I have melted lol) and playing and trying things I only became more fascinated. The fire not only melts things, but it attaches pieces of metal together, and it makes the most beautiful color changes occur when applied to said metal correctly (see the part about melting lol). With the flame I can meld my love of lapidary (rocks) and my love of metal and flame and begin to create a piece from scratch with no purchased components. I am looking forward to many more years of playing with fire and hope that my skill and imagination will continue to grow and make many more beautiful and wearable pieces.
Monday, October 22, 2007
How To Cut Rocks (Step Two)
The second step to making a cabochon from raw rock is to use a template and decide which portion of the rock you want to use for your finished masterpiece. This particular template is two-sided which I prefer as I like to make my mark on both sides.
  I then mark a "b" on the side that is the back with a magnesium wire. That way I don't make any mistakes when I am forming the stone. Sometimes the back and the front can be very similar and as much work as goes into forming these cabochons, I don't want to make a mistake on which side I am working on. Templates com in mm sizes and you can also get
  squares, hearts, crosses and many more. I am still a beginner so I generally
 use the medium sized oval. At this point it is time to fire up the trim saw. Make sure that you wear safety glasses at all times because I can guarantee small pieces of rocks are going to chip off and go flying. Basically the idea here is to trim as close to your oval (or square or whatever you choose) as possible without going over the line. There are of course rules for using this kind of equipment safely. Cut slabs only, not chunks or nodules, Cut straight lines only, let the saw do the work, forcing the saw tears out the diamonds (this is bad. The blades are expensive). If saw is running dry add oil (duh, but you'd
 be surprised), If the you see sparks STOP! your pushing too hard or the saw needs more oil. (see rule number three and four). Clean up after yourself. So to the right is a picture of Ohio flint (beautiful rock by the way. As you can see flint is not necessarily all grey). You can see the magnesium template mark and you can also see that I got a hair too close to the line and also managed to ship a corner off. (What can I say it was my first attempt.) I am saving this for when I have practiced a bit more so I can salvage it because this is one beautiful piece of rock. That pretty much covers step number two. I will post again next week on step number three.
 portion of the rock you want to use for your finished masterpiece. This particular template is two-sided which I prefer as I like to make my mark on both sides.
  I then mark a "b" on the side that is the back with a magnesium wire. That way I don't make any mistakes when I am forming the stone. Sometimes the back and the front can be very similar and as much work as goes into forming these cabochons, I don't want to make a mistake on which side I am working on. Templates com in mm sizes and you can also get
  squares, hearts, crosses and many more. I am still a beginner so I generally
 use the medium sized oval. At this point it is time to fire up the trim saw. Make sure that you wear safety glasses at all times because I can guarantee small pieces of rocks are going to chip off and go flying. Basically the idea here is to trim as close to your oval (or square or whatever you choose) as possible without going over the line. There are of course rules for using this kind of equipment safely. Cut slabs only, not chunks or nodules, Cut straight lines only, let the saw do the work, forcing the saw tears out the diamonds (this is bad. The blades are expensive). If saw is running dry add oil (duh, but you'd
 be surprised), If the you see sparks STOP! your pushing too hard or the saw needs more oil. (see rule number three and four). Clean up after yourself. So to the right is a picture of Ohio flint (beautiful rock by the way. As you can see flint is not necessarily all grey). You can see the magnesium template mark and you can also see that I got a hair too close to the line and also managed to ship a corner off. (What can I say it was my first attempt.) I am saving this for when I have practiced a bit more so I can salvage it because this is one beautiful piece of rock. That pretty much covers step number two. I will post again next week on step number three.
Subscribe to:
Posts (Atom)